
Photography becomes much easier when you understand the fundamentals before worrying about advanced equipment. Photography Tips for Beginners should begin with learning how light, focus, composition, shutter speed, aperture, and ISO affect an image. A smartphone, compact camera, or entry-level DSLR can all produce impressive results when used thoughtfully. Instead of buying several lenses or accessories immediately, spend time observing how different lighting conditions change your photographs. Take the same subject in morning, afternoon, and evening light, then compare the results. Notice shadows, highlights, colors, and details. This simple exercise helps develop your visual awareness. Good photography is less about owning the most expensive camera and more about understanding how to use the equipment you already have. Build your skills gradually, experiment often, and treat every photograph as an opportunity to learn something new.
Understand the Exposure Triangle
Exposure determines how bright or dark your photograph appears. Three important camera controls work together to create the correct exposure: aperture, shutter speed, and ISO. Understanding their relationship gives you much greater creative control.
Aperture
Aperture controls how much light enters the camera through the lens. A wider aperture, represented by a smaller f-number such as f/1.8, allows more light into the camera and can create a beautifully blurred background. A narrower aperture, such as f/8 or f/11, keeps more of the scene in focus.
Shutter Speed
Shutter speed determines how long the camera sensor receives light. Fast shutter speeds can freeze moving subjects, making them useful for sports, pets, and action scenes. Slow shutter speeds can introduce motion blur but can also create attractive effects when photographing waterfalls, traffic trails, or moving lights.
ISO
ISO controls the camera’s sensitivity to light. A low ISO generally produces cleaner images, while a higher ISO can help in darker environments. However, very high ISO settings may introduce visible digital noise.
Practice Composition With Simple Rules
Strong composition can turn an ordinary subject into an engaging photograph. One useful technique is the rule of thirds, where the frame is mentally divided into nine sections. Positioning the main subject near one of the intersections can create a more balanced image. However, this rule should not become a restriction. Centered compositions can work extremely well for portraits, architecture, and symmetrical scenes.
Leading lines are another effective technique. Roads, fences, bridges, pathways, and building edges can guide the viewer’s eyes toward the main subject. You can also experiment with negative space, which gives the subject room to breathe within the frame. Before pressing the shutter, look carefully around the edges of your composition. Distracting objects, bright spots, or awkwardly cropped elements can weaken an otherwise strong photograph.
Learn to Read Natural Light
Light is one of the most important elements in photography. You do not always need studio equipment to create attractive images because natural light can provide excellent results. Soft morning and late-afternoon light often produces gentle shadows and pleasing colors. Midday sunlight can be harsh, but it can still work well when you deliberately use strong shadows or architectural patterns.
For portraits, try placing your subject near a large window. Turn the subject slightly toward the light instead of placing the window directly behind them. Outdoors, observe how trees, buildings, and clouds modify sunlight. Clouds can act like a giant diffuser, producing softer illumination. Rather than simply asking whether a scene is bright enough, ask where the light is coming from and how it shapes your subject.
Choose Camera Settings With Purpose
Automatic modes are useful when you are starting out, but gradually experimenting with manual controls can improve your understanding. You do not need to change every setting for every photograph. Instead, change one variable and observe what happens.
| Camera Setting | Main Effect | Useful For |
|---|---|---|
| Aperture | Controls depth of field and light | Portraits, landscapes |
| Shutter Speed | Controls motion and exposure | Sports, waterfalls |
| ISO | Controls sensor sensitivity | Low-light scenes |
| White Balance | Controls color temperature | Indoor and outdoor scenes |
| Focus Mode | Controls focusing behavior | Still or moving subjects |
Try photographing a stationary object while changing only the aperture. Then photograph a moving subject while experimenting with shutter speed. These exercises make technical concepts much easier to remember than simply reading about them.
Keep Your Camera Steady
Camera shake can make an otherwise well-composed image look soft. Hold the camera securely with both hands and keep your elbows reasonably close to your body. When using a phone, avoid stretching your arms too far away from yourself.
For slower shutter speeds, use a stable surface or tripod when available. If you do not have a tripod, look for a wall, railing, table, or other sturdy object. Taking a breath and gently pressing the shutter can also reduce unnecessary movement. Good stability becomes especially important when photographing at night, indoors, or in situations where you are using longer exposures.
Focus on One Clear Subject
A photograph becomes easier to understand when viewers can quickly identify what matters most. Before taking a picture, decide what attracted your attention. It could be a person’s expression, an unusual building, a colorful flower, a mountain, or a small everyday detail.
Avoid filling every part of the frame simply because you can. Sometimes moving closer creates a much stronger image than using a wide composition. Other times, stepping backward reveals environmental details that provide context. Experiment with both approaches. If your camera offers autofocus points, place focus deliberately rather than always allowing the camera to choose the subject automatically.
Explore Different Photography Subjects
Trying different subjects helps you discover your personal interests. Portrait photography can teach you about expressions and lighting, while landscape photography develops patience and composition skills. Street photography encourages you to notice spontaneous moments, and close-up photography helps you appreciate small details.
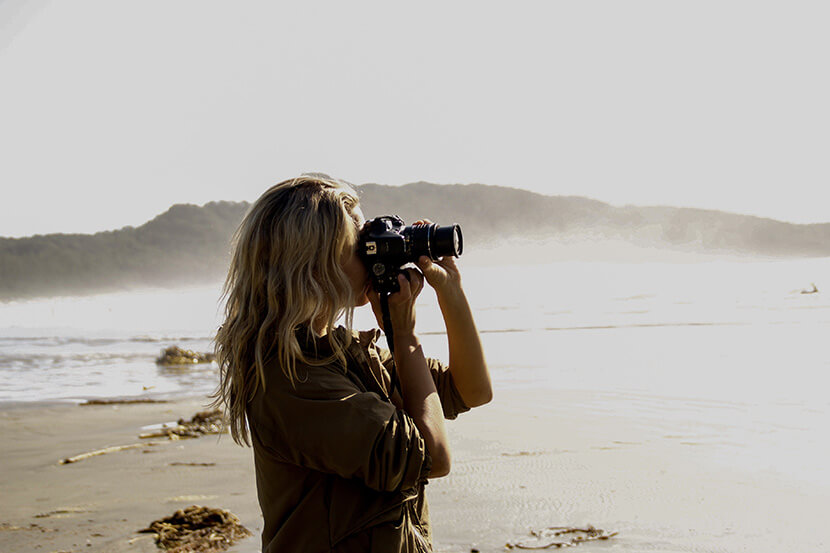
For example, spend one weekend photographing only ordinary objects around your home. Look for interesting textures, reflections, shadows, and patterns. During another outing, photograph movement. These restrictions may seem limiting, but they encourage you to see familiar surroundings differently.
A cricket-themed website such as thecricketrecords.com can also inspire a beginner to practice photographing action, movement, expressions, and timing when observing sporting moments. Fast-moving subjects encourage you to think carefully about shutter speed and focus before taking the shot.
Improve by Studying Your Own Photos
One of the fastest ways to improve is to review your photographs after every shooting session. Do not only look at the images you like. Examine unsuccessful photographs and identify exactly what went wrong. Was the subject out of focus? Was the background distracting? Did harsh light create unwanted shadows? Was the image too dark?
Keep a small record of settings for photographs you particularly like. Over time, patterns will become obvious. You may discover that you prefer wide apertures for portraits or faster shutter speeds for outdoor activity. Reviewing your own work transforms random shooting into purposeful practice.
Use Editing as a Finishing Tool
Editing can improve a photograph, but it should not be used to rescue every poorly captured image. Start with basic adjustments such as exposure, contrast, highlights, shadows, white balance, and cropping. Small changes are often enough to make an image look more polished.
Avoid excessive sharpening, saturation, or filters that make photographs appear unnatural. A good editing workflow usually begins with correcting technical issues before making creative adjustments. Keep an original copy of your image so you can return to it later if you change your mind.
Build a Consistent Practice Routine
Improvement comes from regular practice rather than occasional bursts of enthusiasm. You do not need to spend several hours every day with your camera. Even a short, focused session can be productive.
Try these simple exercises:
- Photograph the same subject from five different angles.
- Capture one scene using three different compositions.
- Practice photographing movement with different shutter speeds.
- Take portraits using only natural window light.
- Photograph textures, reflections, and shadows around your neighborhood.
- Review your best and weakest images at the end of each week.
If you enjoy cricket-related visual storytelling, a site such as iplteamtimelines.com can provide ideas for practicing sequential sports photography, where timing and movement become central to the image.
Avoid Comparing Your Progress Too Quickly
Social media can make photography seem effortless because viewers usually see only the finished images. Behind a successful photograph there may have been careful planning, multiple attempts, favorable lighting, and extensive editing. Comparing your first month of photography with someone else’s years of experience can become discouraging.
Instead, compare your current work with photographs you created several weeks or months earlier. Look for improvements in composition, focus, exposure, and subject selection. Progress becomes easier to recognize when you measure yourself against your own previous work.
A timeline-focused resource such as cricketnationalleague.com can also spark ideas for creating visual stories over time, especially if you enjoy documenting events, teams, people, or changing environments.
Create Stories, Not Just Individual Images
A memorable photograph often communicates more than appearance. It can suggest emotion, movement, atmosphere, or a sense of place. When photographing a person, think about what their surroundings reveal about them. When photographing an event, capture preparation, action, reactions, and quiet moments rather than only the main event.
This approach is particularly useful for beginners because it teaches you to look beyond technical perfection. A technically imperfect photograph can still be meaningful if it captures an authentic moment. As your skills develop, combine good exposure and focus with thoughtful storytelling.
For people interested in sports documentation, nationalcricketteamtimeline.org can serve as inspiration for thinking about how individual photographs can contribute to a larger visual timeline or narrative.
Keep Learning Through Experimentation
There is no single formula that produces a great photograph every time. Photography involves technical knowledge, observation, creativity, patience, and experimentation. Try unusual perspectives, shoot from a lower angle, photograph reflections, use shadows creatively, or deliberately leave empty space around your subject.
You can also challenge yourself to use one lens or one focal length for an entire day. This limitation forces you to move physically and think more carefully about composition. If you normally photograph colorful subjects, try black-and-white images to concentrate on shape, texture, and contrast.
Photography is also a useful way to document everyday life. A practical advice-oriented resource such as wutawhelpadvice.org can encourage beginners to approach photography as a skill that grows through useful habits, experimentation, and consistent observation.
Conclusion
Learning photography does not require complicated equipment or years of technical study before you can create enjoyable images. Start with the camera you already own, understand the exposure triangle, practice composition, observe natural light, and review your photographs regularly. Most importantly, give yourself permission to experiment and make mistakes.
Every unsuccessful image provides information about what you can improve next time. With consistent practice, ordinary scenes begin to look more interesting, and technical decisions become more natural. The goal is not simply to take sharper or brighter photographs; it is to develop the ability to notice meaningful moments and communicate them through images. Keep shooting, keep reviewing, and let your personal style develop naturally.